
UPDATED ON July 15, 2020
PUBLISHED ON October 09, 2017
Do you want to create custom menus of your own for your website? Well, if yes, you’d be glad to know that you can create custom menus in WordPress in just a few clicks. You just need to know what exactly you want in your custom menu. Today, we will discuss how we can create custom menus in WordPress with ease. Simple and quick!
WordPress, by default, provides you with Navigation Menus, let’s simply say Menus. It’s a feature that allows you to display various menus on your site. The built-in WordPress menu feature also allows you to create custom menus of your own in WordPress in place of your theme’s default menus. The default menu will just list out the current WordPress pages. Custom menus in WordPress may contain links to pages, categories, custom links or other content types. You will also be able to specify a different navigation label for a menu item as well as assign other attributes.
There is no specific limit on how many menus you can create, so if your theme includes more than one menu location, you can choose which custom menu you want to place in each location.
Contents
- Create Custom Menus
- Adding Menu Items
- Adding Sub-menu Items
- Choose Menu Location
- Create Custom Menu in Live Customizer
- Add Social Menu/Custom Links
- Delete Menu Items
- Rename Menu Items
Having said that, let’s move on to the tutorial—how you can easily create custom menus in WordPress.
Create Custom Menus in WordPress
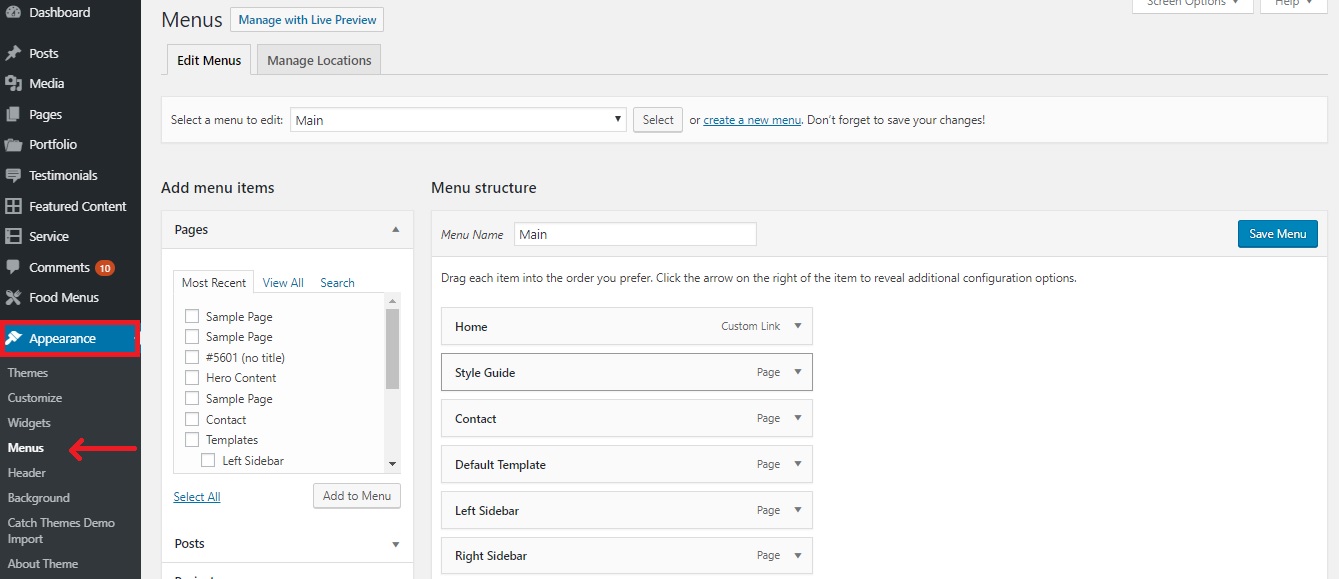
The first step is to head over to Appearance on your WordPress Dashboard. Click on the Menus link in the Appearance tab. You will now see the Menus editor page.
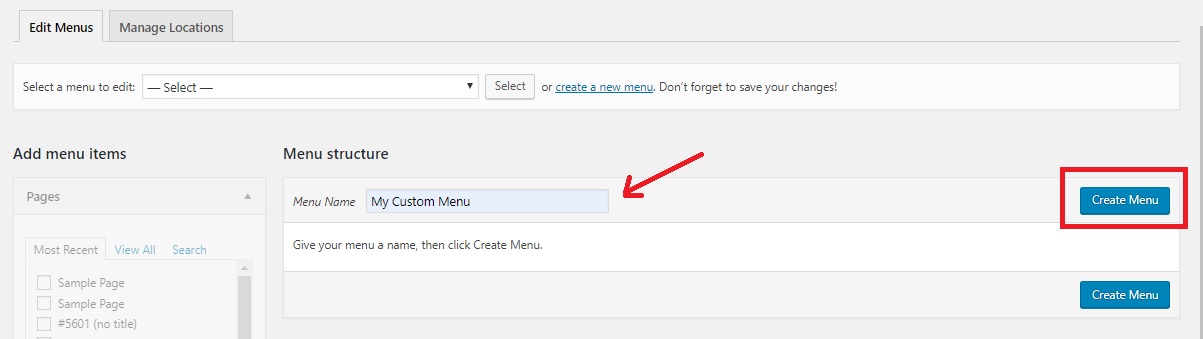
Click on ‘create a new menu’ to create a new custom menu or enter the menu name you want to customize. I’ll go for a new custom menu. Give your new menu a name you want and click on the Create Menu button.
Adding Menu Items
You can now customize the custom menu your way. Simply start adding menu items from the boxes on the left, such as Pages, Posts, Categories, Tags, and more. Here, I am adding only a few of my pages. You can add the ones you want. If you’re willing to add a social menu, you can use the custom links option.
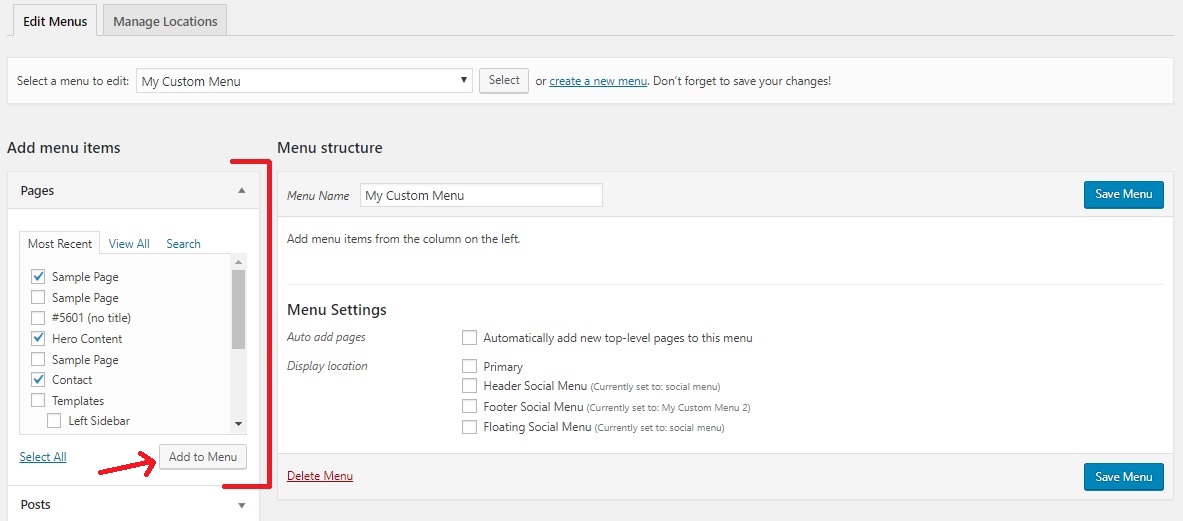
If you want to change which menu option you see from this page, then head over to the Screen Options tab. You can checkmark and add other menu items options such as testimonials, featured content, services, custom links, and many more that your theme provides.
Menu Items:
- Custom Link – To add a custom URL linking to another site.
- Pages – To add a link to another page on your site.
- Posts – To link directly to a blog post on your site.
- Testimonials – Link to testimonials.
- Projects – For your portfolio projects.
- Categories – To show a feed of blog posts from a specific category.
- Tags – To show a feed of blog posts from a specific tag.
- Project Types – links to specific portfolio project types.
- Project Tags – links to specific portfolio project tags.

Adding Sub-menu Items
Not only the standard menus, but you can also add sub-menus to your main menu items. These drop-down-like sub-menu items are essential if you want to display something that belongs to a certain category or item displayed on your main menu. It is an extremely user-friendly feature to have on your menu for hassle-free user-experience.
To add sub-menu items on your menu, simply add them to your menu first and then, drag the item to the right-below side of the specific menu item, which will be known as the “parent item”.
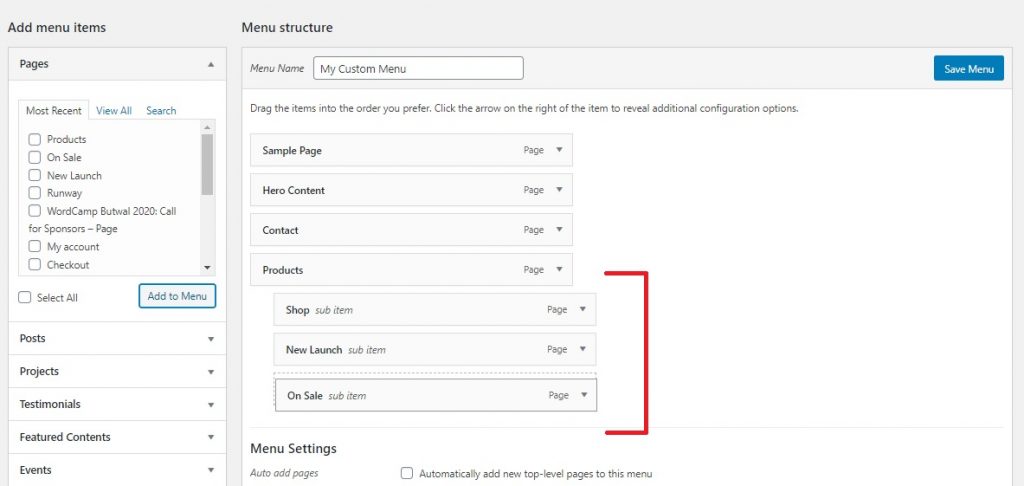
You can add as many sub-menu items as you need. Just drag them to the bottom right side of its parent item.
Choose your custom menu’s location
After check-marking the items you want in your custom menu, you can switch their order if you want. You can simply drag and rearrange the menu items. Then, you need to select the menu location where you desire to display your menu. You can choose your menu’s location under the Menu Settings section.
The custom menu location options also differ based on the theme you’re using.
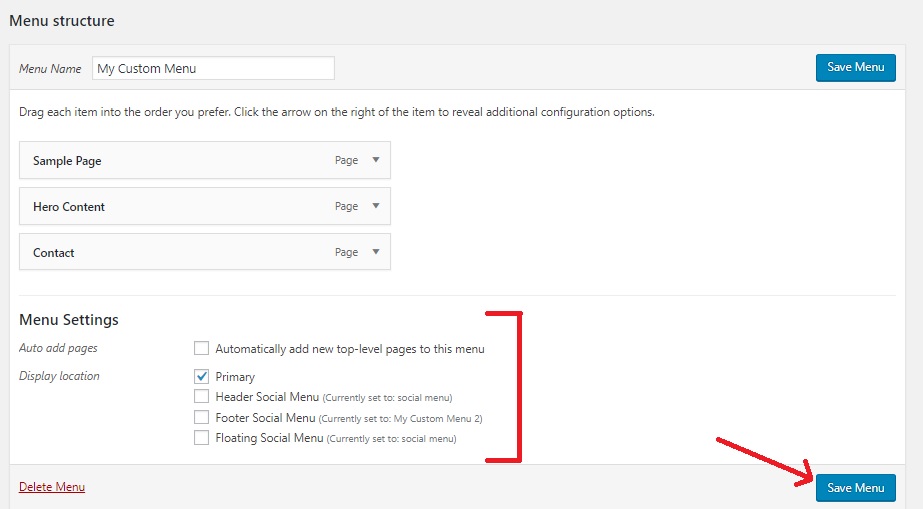
I’m going to display my custom menu on the primary menu section. You can choose the Display Location as you prefer.
Click on the ‘Save Menu’ button after you finish arranging your menus and selecting your display location.
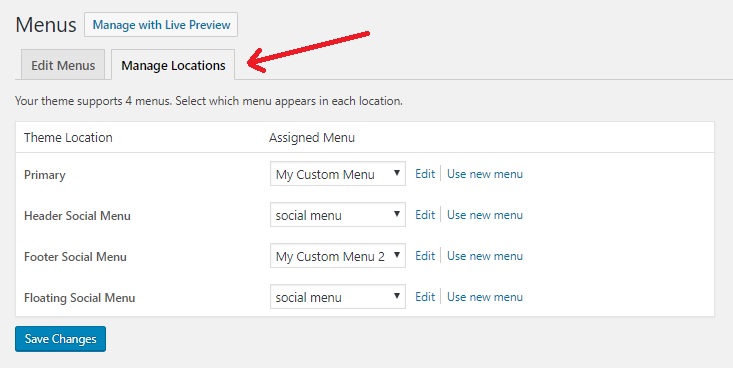
Now, you have a new navigation menu created by you that can be added to any menu location on your WordPress website. You can also manage the location of your custom menu from the ‘Manage Location’ tab next to the Edit menus. Here you will also be able to know how many menus does your theme support and will be able to select which menu appears in each location.
That is all you need to do. You can now successfully create your own custom menus in WordPress and that too without facing any difficulty.
 Wait, there’s more! You can also create custom menus in WordPress via Live Customizer. Below is the step by step process to create custom menus in WordPress from your Live Customizer.
Creating Custom Menus in WordPress through Live Customizer
First of all, head towards Appearance > Customize from your WordPress admin dashboard and click on the Menus option.
Click the Create New Menu button and give your new custom menu a name and select the Menu Location.
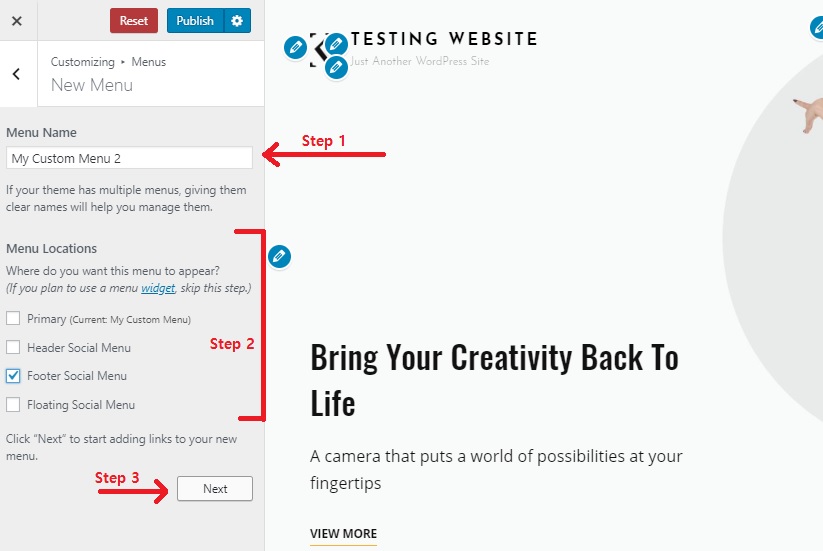
Start adding items to your custom menu. Clicking on the Add Items button will introduce you all the sections you can add to your custom menu including pages, posts, testimonials, categories, and more.

Checkmark the ones you find most important and want to display on the menu section. You can add sub-menu items by simply dragging them slightly to the bottom right side of the main menu item. Hit the ‘Publish’ button and see the custom menu in action.
Add Social Menu/Custom Links
To add a social menu with the help of Custom Links, we will be following the steps discussed above and create our social menu through the Live Customizer. After entering the name, I am creating a custom social menu with the help of Custom Links.
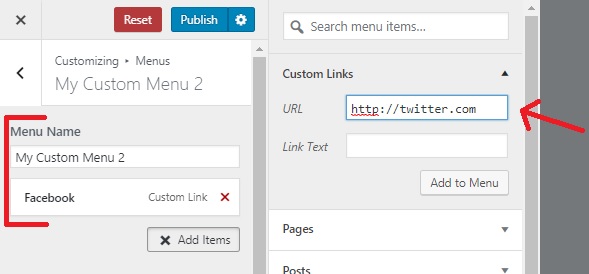
On the Custom Links, you need to add the link of the social media platform that you want to display on the URL section. You can also enter the Link Texts to be displayed. Here, I have added Facebook and Twitter as my social menu.
You can now hit Publish and visit your site to see your social menu.

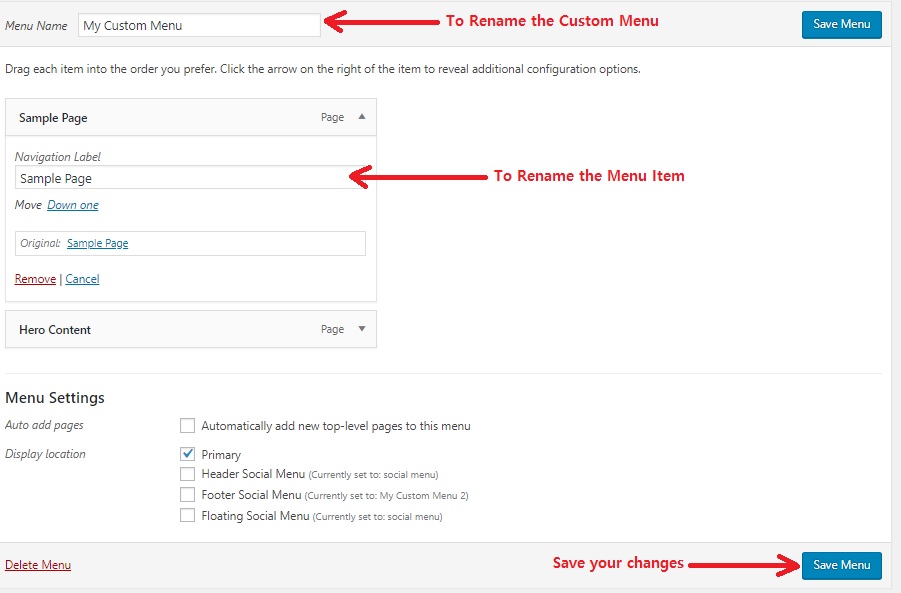
Delete or Rename Menu Items
So, for times like such, if you wish to delete only certain menu items, you can simply click on the small arrow on the right side of the menu item.
Once you click the arrow, you will see all the details of the menu item and there will be a Remove button below. Click on that Remove button and poof —your menu item is gone!

Likewise, if you want to completely delete the custom menu, you can simply scroll down and Click Delete Menu.
Conclusion
There you go. These were the two easiest methods you can use in order to create custom menus in WordPress. You can now easily create your very own navigation menu and that too without any coding knowledge.
We hope this article was helpful. If it was, make sure you subscribe to our newsletter and give us a follow on Facebook, Twitter, and Instagram.
Heh! Thanks for the tips 🙂 I was looking to do this at one moment and had no clue on how I can do it!
Hi, I always dedicate myself to being self-taught in everything corresponding to wordpress and this post seems very good to me, good work keep it up