Do you want to provide better search results on your site for your visitors? Ajax AutoSearch is here to help! More reliable Search Results in just seconds; Search like a pro!
As website owners, we are always looking for ways to provide a better user experience for our audience. We need to be very mindful of all the features we provide through our site as all of the features are equally important for a better user experience. Likewise, the search bar on your site is one of the most crucial features. It enhances the user experience by saving users’ time and providing adequate search results. The default search feature in WordPress is very limited; it does not have any filter options or other customization abilities. Since it is one of the major sections of our site, it is very important that we take full control over it. So, today, we will be showing you an easier way to enhance your search feature and improve your site user experience.
In order to display better search results on your site, we will be going for the quickest solution, a simple and quick WordPress Search Plugin with many customization controls on your fingertips. Cheers, Ajax AutoSearch!
Now, the plugin comes in both free and premium versions. I will be demonstrating both versions and you can choose the one that fits your bill the best. Let’s get started!
Search better with Ajax AutoSearch Plugin
Ajax AutoSearch (FREE)
First, you need to install and activate the Ajax AutoSearch plugin. It is absolutely free and available for download on WordPress.org. After activating the plugin, you can head towards its setting page for further customization options. Visit Dashboard > Ajax AutoSearch.
All the available customization options are now displayed on your screen. As you can see on the screenshot below, there are checkboxes available to enable different search filters. You can also choose to show/hide featured images for your search results. Moreover, you can control the display post limit number for your search results as well. With these quick controls over your search feature, your search bar will now be more efficient and user-friendly.
The customization options sure are limited, but the provided ones are crucial and powerful for better search results. The plugin is decent enough for starters and site owners who don’t want extra features and functionalities.
DOWNLOAD AJAX AUTOSSEARCH FREE
However, if you want advanced functionalities and more control over your search feature, you can go for the premium version of the plugin.
Improving Search Results Effortlessly with Ajax AutoSearch Pro
Ajax AutoSearch Pro comes with features like Different Search Filters, Display Featured Image, Post Limit, Layout Options, and Columns. With extensive features, Ajax AutoSearch Pro also comes with a responsive design and elegant outlook that would play along with your site type.
We are using the premium version of this plugin, Ajax AutoSearch Pro. You can get the premium version from Catch Plugin’s website. Meanwhile, if you want to try the free first, you can download it from the WordPress Plugin Directory for absolutely free.
After you install and activate the plugin, the default settings will be placed for you, which works decently for any site. However, if you want your uniqueness, head over to the plugin’s settings page from your dashboard. Visit Dashboard > Ajax AutoSearch.
Here you will have the plugin’s setting page displayed to you.
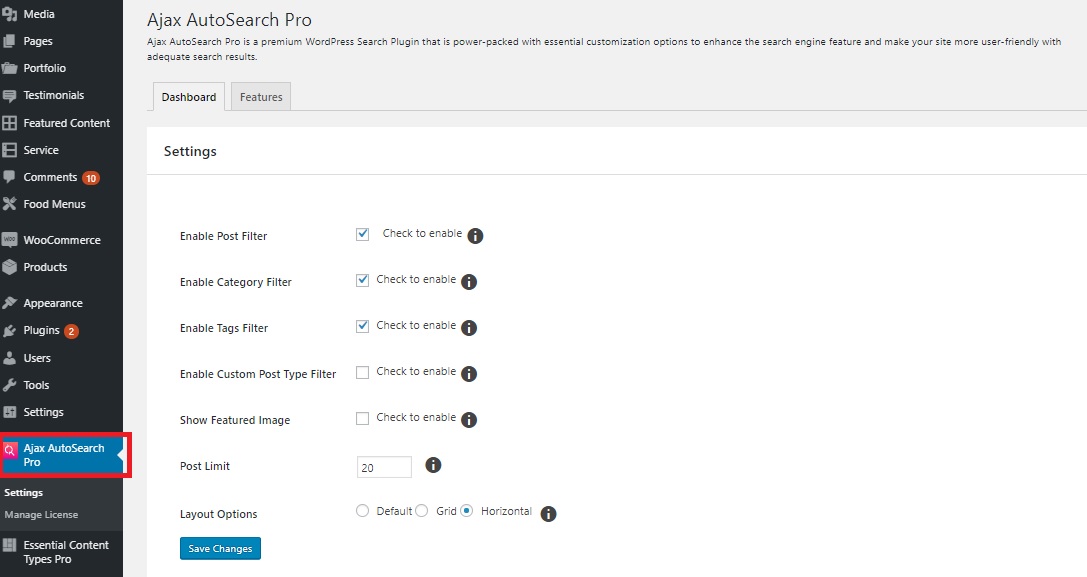
As you can see, there are different Search Filters to be displayed on the Front-End Search Bar of your site. You can checkmark the ones you want to display for your audience. There are four different Search Filters: Post Filter, Category Filter, Tags Filter, and Custom Post Type Filter. Here’s what each filter would display:
- Post Filter: To display search results from posts, pages, and attachments.
- Category Filter: To display search results from different categories
- Tags Filter: To display search results from different tags
- Custom Post Type Filter: To display search results from custom post types like portfolio, testimonials, and more.
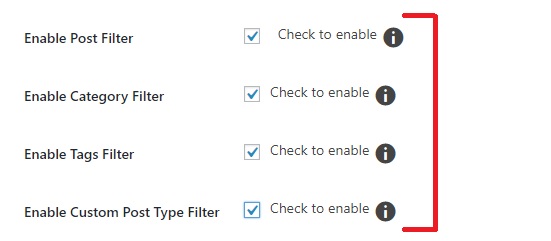
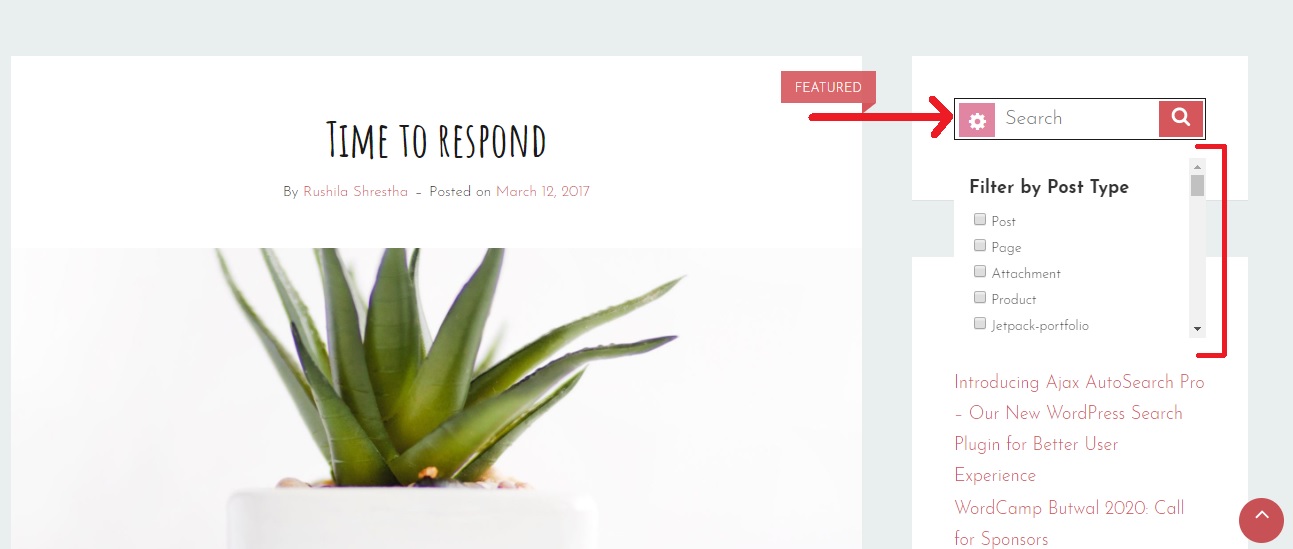
After you’ve done your Filter selection, you can save your changes and check if your check-marked filters are displayed on the Front-End. You can click on the Settings icon available on the Search bar of your site. The filters you enabled will be displayed elegantly on your search bar now.
The next option you have is to display Featured Images of your search results on the Ajax while you type in your search terms.

Right below the Features Image option is the Post Limit Number. This option allows you to choose the number of search results you want to showcase on a single page. You can display from 1 to 20 search results at max on a single page.

The last option you have is the Layout Options. There are three different layouts:
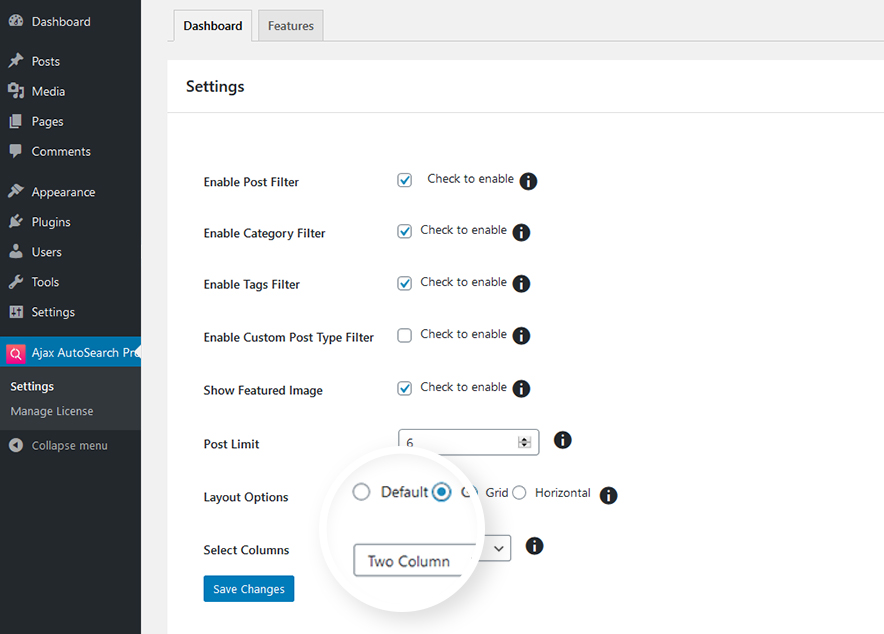
- Default: Display search results vertically
- Grid: Display the search results beautifully in a grid layout. The feature looks amazing with the featured image option enabled. You can display the grid search results in 2 to 4 columns. The search results will be displayed in a single column if your search bar is comparatively small-scale by default.
- Horizontal: The search results display aesthetically in a horizontal manner.
And that is all you have to do. You can save your changes and have a preview of search results on your production site.
With the help of the Ajax AutoSearch Pro plugin, we were able to display an enhanced search bar on our site. Your visitors now will be very much satisfied with the search results they’re getting. This definitely is a great and probably one of the easiest ways to quickly and efficiently improve user experience on your website.
So, go ahead, show some love to the Ajax AutoSearch plugin and improve your site search results today!
If you have anything to add, ask, or share, let us know in the comments section below.


