
Do you want to disable Google AMP in WordPress? Many bloggers and websites who jumped on the Google AMP trend are now disabling it for different reasons. The challenge is that disabling Google AMP is not as simple as one would hope for. If you are wondering how you can disable Google AMP in WordPress, you might want to stick with this article.
Google AMP stands for Accelerated Mobile Pages. It is an open source initiative supported by technology companies like Google and Twitter. The goal of the project is to make web content load faster for mobile users. Accelerated Mobile Pages or AMP uses bare minimal HTML and limited JavaScript. This allows the content to be hosted on Google AMP Cache. Google can then serve this cached version to users instantly when they click on your link in the search results.
If you have tried Google AMP, and it has negatively affected your conversion rates, then you should probably disable Google AMP in WordPress (your website).
With that being said, today, here at DevotePress, we will be learning the easiest way possible to disable Google AMP in WordPress.
Disabling Google AMP in WordPress
There are a couple of WordPress plugins that allow you to add Google AMP support to your website. The basic settings remain the same regardless of what plugin you are using.
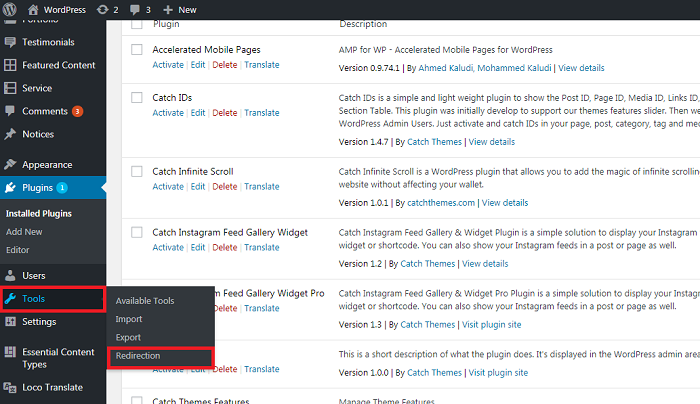
The very first thing you need to do is deactivate the Accelerated Mobile Pages (AMP) plugin from the WordPress Plugin Directory.

Deactivating the AMP plugin will disable the AMP support on your website.
Setting up Redirects
Disabling the AMP plugin will now remove the AMP version from the website, but it is not enough if you have AMP turned on for more than a week. To fix the problem of Google showing the pages that were cached in the index, you need to redirect users coming to AMP pages to the regular non-AMP pages.
Using the Redirection Plugin
First of all, you need to install and activate the Redirection plugin from the WordPress plugin directory.

Upon activation, go to Tools > Redirection page to set up redirects.
Next, add the following code to the source URL field.
/(.*)\/amp
In the target URL field, add your website’s URL in the following format:
http://example.com/$1
Replace example.com with your own domain name. Then check the Regex checkbox and select Redirections under the Group drop-down menu.
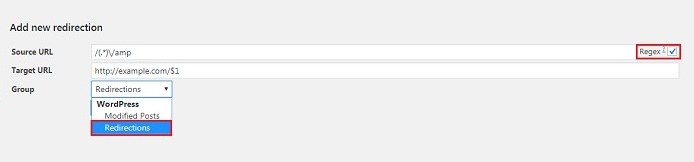
Lastly, click on Add Redirect button to save your changes.

You can now visit an AMP page on your website to see if the redirect is working properly.
And that’s it. You can use the above method to disable Google AMP in WordPress. We hope the article helped you with disabling the Google AMP in WordPress. If you have anything to add, share, or ask, you can use the comments section.
Reference: WP Beginner
It’s actually a great and helpful piece of info. I am
happy that you simply shared this useful info with
us. Please keep us informed like this. Thank you for sharing.
When I originally left a comment I appear to have clicked on the
-Notify me when new comments are added- checkbox and from now on each time a comment is added I recieve 4 emails with the same comment.
Is there an easy method you are able to remove me from that service?
Cheers!
You can remove yourself from getting follow-up comments by simply clicking the “Unsubscribe” link provided to you at the bottom of our email.