
Do you want to be creative and make your site unique among others? Adding Cinemagraphs to your site can help you make your site attractive and distinctive. While it is a creative and unique method, it is also absolutely easy to create your own cinemagraphs. Today, here at DevotePress, we will be demonstrating how you can easily create cinemagraphs and add them to your site.
Cinemagraphs are actually animated GIF images dressed completely in a different way. In Cinemagraphs, only one part or area of the image would be moving and the rest of the image stays still, unlike GIF images where the whole picture moves. Cinemagraph images are an extremely engaging element for your blog as it instantly captures the visitors’ attention with their unique features. The images look very cinematic and that is exactly why they are called cinemagraphs. Cinemagraphs are extremely crucial when it comes to long-form content, podcast episode, or an audio story. Creating cinemagraphs are slightly different than regular GIFs. However, cinemagraphs are extremely easy to create and here is how you create one.
How to Create and Add Cinemagraphs in WordPress
To create and add cinemagraphs in WordPress, you will be needing a video clip, Adobe Photoshop, and your time, patience, and creativity. Remember that you don’t need to be a pro at Photoshop to create your own cinemagraphs. Once again, I am saying this, it is very easy to create one.
First of all, you need to get your video ready, you can use a video editing tool like iMovie to trim the video if it is too long. For this tutorial, I will be using the above short video; I will only capture the pigeon’s movement and the background will remain still. Let’s do this!
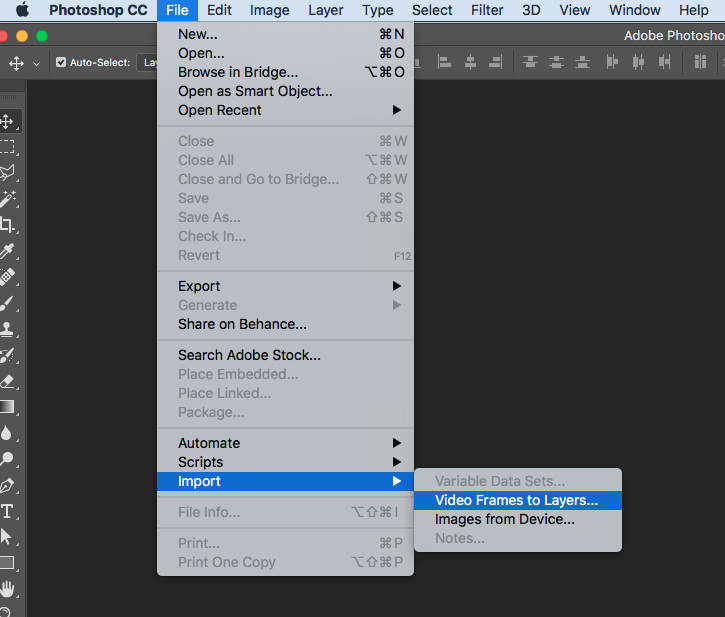
Next, open Photoshop and import your video into layers by visiting File > Import > Video Frames to Layers menu.
Then, select your file and the following pop-up will appear:
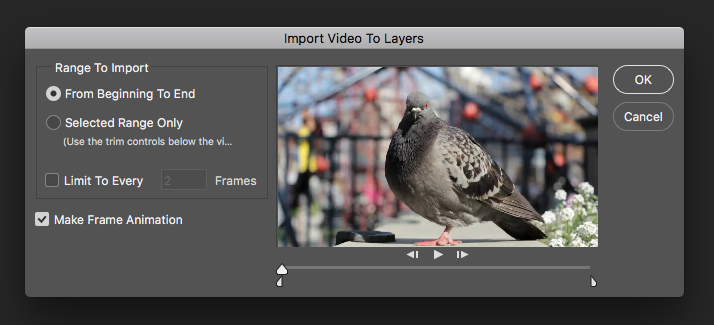
Here, you have to choose to upload the entire video or trim them to a specific range. If your video is longer than the portion, you’ll actually need to trim it. The shorter you make, the easier it will be for you to work with it.
You will now see video frames as layers under the layers panel. Select all the layers, except for the very first layer, i.e. Layer 1.

Go to Layer > New > Group From Layers menu or press Ctrl + G to add layers into a group.

Now, you need to select the group and go to Layer > Layer Mask > Reveal All to add a mask to the group.

After you finish adding the mask, press Ctrl + I to invert the color of the mask. Set the foreground color to white and then click on the brush tool. You need to use the brush tool to highlight the area you want to show in the loop.
After that, you need to go to Window > Timeline to open all your layers in an animation format. You will notice all frames appear transparent in the timeline except for the first frame.

You can select the first layer (layer 1) to change this and click on the Unify Layer Visibility icon and press the Match button.

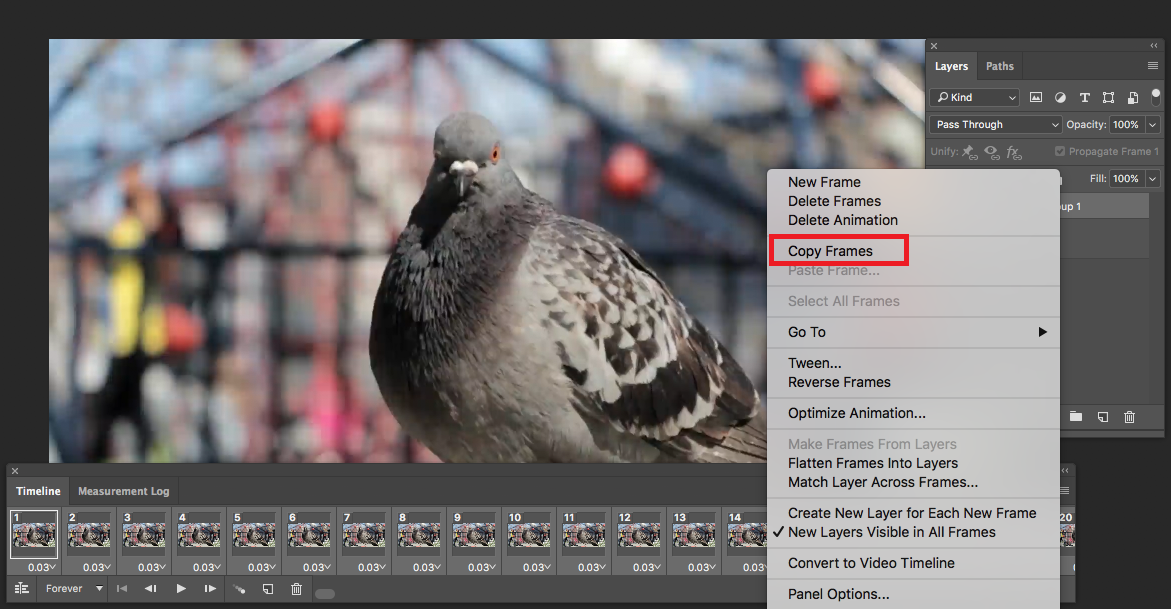
Now, you need to click on the toggle icon of the Timeline and select all frames. Click the toggle icon again and choose Copy Frames.
Again, click on the toggle button and select “Paste Frames”, select “Paste After Selection” and then click on the OK button.

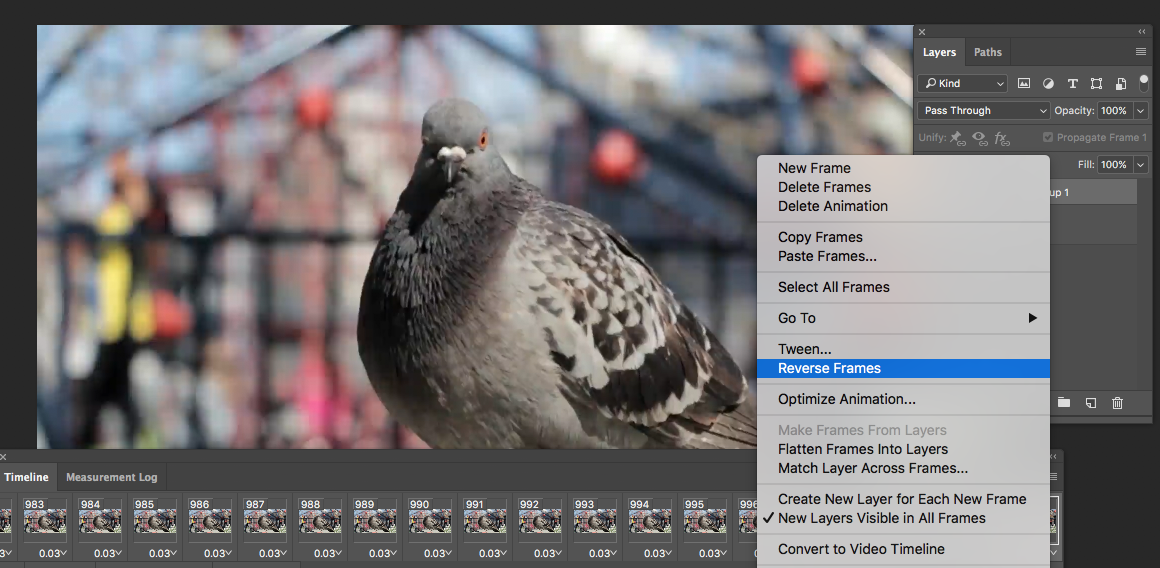
You will now have to click on the Timeline toggle again and select the Reverse Frames option.
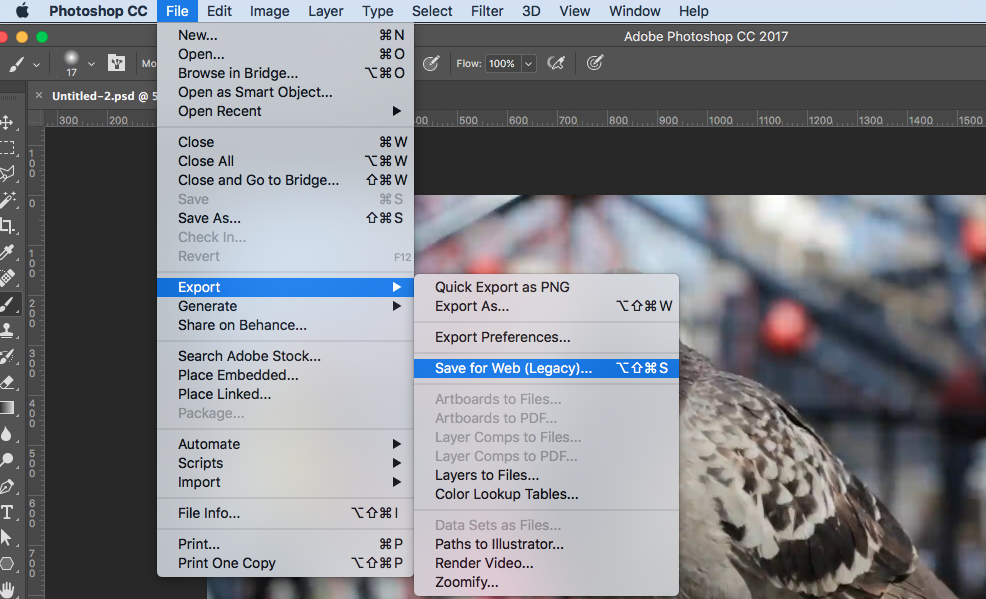
Now, go to File > Save for Web to save it as a GIF file.
And, that is it. That’s all you need to do to create your very own cinemagraph to share with the world. You can add it to your WordPress pages or posts just like you regularly upload your gif images and grab your visitors’ attention while they read your articles. Here is how my cinemagraph turned out:

I hope this article helped you create and add cinemagraphs in WordPress. If you have anything to ask, share, or add, feel free to use the comments section below.
1 thought on “How to Create and Add Cinemagraphs in WordPress – Be Creative!”